Showing posts with label place cards. Show all posts

Tuesday, June 9, 2009

Childhood photo placecards


Printing an old snapshot of each guest next to his or her name is a perfect way to honor your nearest and dearest — as well as an instant conversation starter to break the ice at your reception for guests who won't already know everyone at their table.
For the full instructions, head on over to Evite Blog

Monday, May 11, 2009

Photo table numbers


Another great idea from Martha Stewart Weddings

Take photographs of you and your groom holding up numbers and use them as your table numbers. Print them in black and white so they dont clash with your flowers. You can use different poses for each different number.
For something a bit different, try dressing up as different characters for each photo

Hanging Place cards


These funky place cards are great if you dont want a cluttered looking table. You can personalize them in the theme & color of your wedding.
The instructions on how to make them can be found on Style Me Pretty

Friday, February 13, 2009

Parasol Seating Cards - perfect for a beach themed wedding


From Martha Stewart Weddings

These cheerfully colored umbrellas sporting seating assignments dot miniature sand dunes at the entrance to a summer reception.

You'll need a 1-inch-deep tray, a sheet of 1/4-inch foam board cut to fit into bottom of the tray, and some sand. Lay the foam board in the tray, and cover with sand. Drizzle sand unevenly, sifting a bit more here and there to form dunes. Print your seating assignments onto colored paper, and cut them into strips; glue strips to the shafts of the umbrellas. Poke the umbrellas through the sand into the foam board at an angle so guests can easily find their names.

Thursday, January 29, 2009

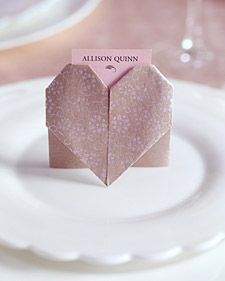
Paper-Heart Place Cards

From Martha Stewart Weddings


Choose 6-inch square origami papers with a pretty pattern or different color on each side; both will be visible in the heart.

1. Lay paper on work surface with the side you want for the heart face down. Fold paper in half; unfold.

2. Bring top left corner in to center crease; repeat with top right corner.

3. Turn paper over.

4. Fold left edge in to center crease; repeat with right edge.

5. Fold top point down to meet with bottom edge. Fold top outer corners back. Fold two flaps that meet in the center under, to create the V of the heart shape. Slide place card into pocket behind heart, and stand the heart up.

Wednesday, January 28, 2009

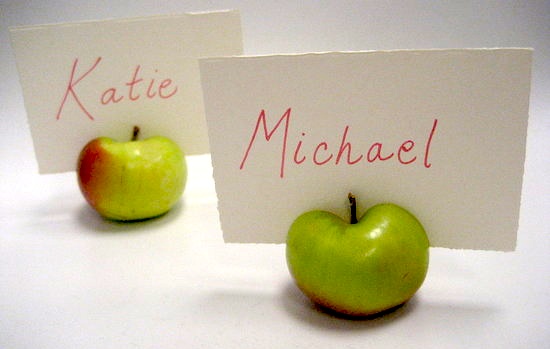
Cheap place card holder ideas

I found these on Do It Yourself Wedding and thought they were great ideas for cheap & easy place card holders....


This one is from Yum Sugar


Tuesday, January 27, 2009

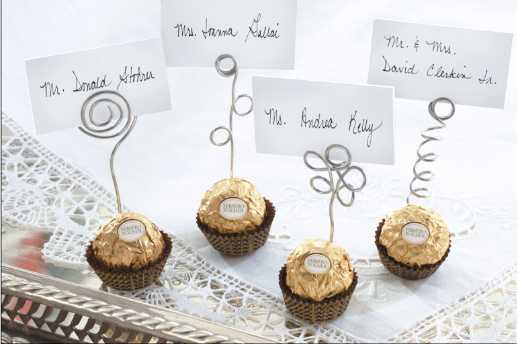
Ferrero Rocher Placecards


Materials:

  • 10 Rocher Chocolates
  • 12-14'Armature wire, or other 16 gauge wire such as floral, copper or craft*
  • Wire cutters
  • 1 pencil, wooden spoon, or dowel
  • Double stick tape
  • 10 standard sized Place cards or paper measuring 2 1/2" x 1"

Instructions:

TIGHT TWIST

  1. Cut a piece of armature wire about 14 inches long with wire cutters.
  2. Holding the pencil in one hand, gently secure one end of the wire between your thumb and the pencil. Use your other hand to wrap the wire around the pencil three times. Push the wire together on the pencil if there are any gaps, as this will make a more secure place for your card to fit. At the same time, gently press the end in to avoid any sharp edges.
  3. Pull on the wire while it still connected to the pencil to straighten it. Remove the pencil and place it against the wire about 1 "away from the loops you just made. Wrap the wire around it one more time. Pull the wire straight at the end of the loop so continues to move in the opposite direction of the loops you just made.
  4. Make a base with the opposite end by twisting the wire around your thumb a few times and bending it perpendicular to the stem. Adjust the wire so that it is balanced.
  5. Attach a small piece of double stick tape to the base of the Fererro Rocher wrapper. Place it on the wire base. Slide your place cards into the twist up top and impress your friends!!

LOLLIPOP SWIRL

  1. Cut a piece of armature wire 16 "long with wire cutters.
  2. Pinching one end between your thumb and forefinger, coil the wire in a circular motion 4 times to create a disk resembling and old fashioned lollipop. Pull the wire straight down from the "lollipop" about 2 1/2 ".
  3. Make a base with the opposite end by twisting the wire around your thumb a few times and bending it perpendicular to the stem. Adjust the wire so that it is balanced.
  4. Attach the Ferrero Rocher as explained above in the "tight twist".

FLOWER

  1. Cut a piece of wire 14" long with wire cutters.
  2. Holding the pencil in one hand, secure one end of the wire between your thumb and the pencil. Use your other hand to wrap the wire around the pencil one time. Remove the pencil and place it directly under the loop you just made. Make another loop in the same fashion that you made the first one. Do this a third time only make two loops and press them close together. Make two more separate loops for a total of 5 loops, the one in the middle being double. This double loop, when finished will actually be your top loop where you will put the place cards.
  3. Holding the wire with the loops on the right, pull the top loop down to the left around in a circle to meet the last one. Adjust the wire to create the form of a flower.
  4. Make a base with the opposite end by twisting the wire around your thumb and bending it perpendicular to the stem of the flower. Attach The Rocher as explained above in the "tight twist".

CORKSCREW

  1. Cut a piece of armature wire 14" long.
  2. Hold the wire between your thumb and the pencil and wrap the wire around the pencil twice. Push the twists close together.
  3. Wrap the wire around the pencil four more times, but this time leaving 1/4" of space between each twist. Pull the wire off the pencil.
  4. Bend the top double loop so that it is perpendicular to the rest of the loops.
  5. Wrap the opposite end of the wire around your thumb e few times and bend it so that it is also perpendicular to the corkscrew. This is your base. Tape the Ferrero Rocher to the base as explained in the "tight twist".